Do you want to set up an online store where you can sell your products? It can seem a difficult and time-consuming process if you are not tech-savvy. This used to be like this earlier but not anymore. You can create an ecommerce website on WordPress without acquiring any special skills or in-depth knowledge of coding.
Why Choose WordPress?
The most important step while creating a website is choosing the right platform. For an online store, you have a few good options of website development platforms that you can choose from but WordPress is the most suitable one. WordPress offers plenty of pre-made themes that make the process of designing the storefront effortless. You also have a bunch of options for plugins if you want to use any to add some extra functionality. From the product display to the shopping cart and checkout process, you will get a plugin for almost everything.
Another thing that makes WordPress win over any other option is the flexibility this platform provides. You will have complete control over your website’s appearance and functionality also. WordPress is free to install, deploy and upgrade, as a result you can save a lot of money. You will only have to pay for the domain name and web hosting.
How to Create a WordPress Ecommerce Website?
If you are wondering what all it takes to create a fully-functional online store, do not worry. Here we are going to explain the procedure in detail.
To build an ecommerce website, you will have to choose an ecommerce plugin. In this tutorial we are using WooCommerce.
Select a Domain Name and Hosting Provider:
The very first step is, picking a suitable domain name for your website. While selecting the domain name you also have to make sure that it represents the overall idea of your business. This name will be used in creating the unique address of your website so make sure you choose something that is easy to remember. As WordPress is free to use, you will have to pay for this domain name. There are a few good websites from where you can check the availability for your desired domain name and also purchase one, if available. You can get your domain name at a reasonable price from GoDaddy, NameCheap etc.
The next thing you will need for your ecommerce website is web hosting. In simple words, hosting is similar to renting some space for your website over the internet. There are two different types of hosting: shared and managed. For other types of websites, you can go for the shared one but it is not recommended when you are creating an ecommerce website. For your online store, always purchase managed hosting. There are a few good options of web hosting providers: Bluehost, DreamHost, Hostgator etc. All of them have different plans and features also. According to your website’s requirements, you can pick a suitable hosting provider.
If you are using WooCommerce plugin for your online store then you can also go with Bluehost’s WooCommerce hosting plans. These plans are dedicated ecommerce powerhouses and that too at reasonable prices.
Install WordPress:
Next step is WordPress installation. There are two ways to install WordPress:
- One-click install: As the name suggests, it is an easier way to install WordPress. While choosing your hosting provider, prefer the ones offering one-click install. After signing up for web hosting, you only have to go to the hosting dashboard and click on a button that says ‘Install WordPress’.
- Manual installation: You have to perform manual installation if your hosting provider does not offer one-click installation. This method requires you to download WordPress to your computer, then upload it to the hosting dashboard.
Install and Configure WooCommerce: To add ecommerce functionality to your website, you will need an ecommerce plugin. There are a few good options available and you can choose any of them. Here we will explain the process using WooCommerce.
Similar to WordPress, WooCommerce is also an open-source platform so it is free. You might have to pay for some extensions but there is no charge for this plugin itself. You can create an ecommerce website that includes:
- Product pages
- Cart and checkout
- Secure payments
- Shipping options and label printing
- Automated tax calculations
- Integration with Google Analytics, Facebook, MailChimp etc.
To install and configure WooCommerce, you have to follow these steps:
- Log in to the dashboard of your WordPress website.
- Go to the sidebar and you will see the ‘plugins’ section. Click on this option and then click on ‘Add New’.
- On the next screen, you will see a search bar. Here, you have to type ‘WooCommerce’ and press Enter.
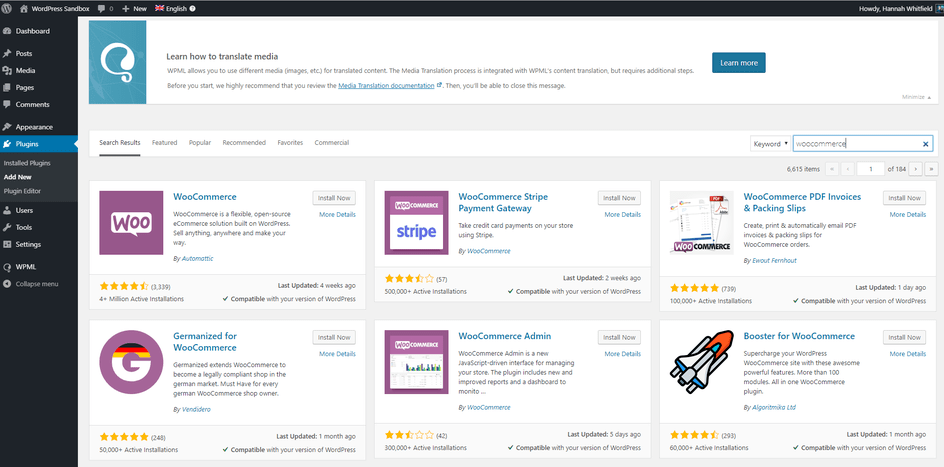
- You will see some search results. Click on the first search result that says WooCommerce by WooThemes.
- Click on ‘Install Now’.
- After a few moments, you will see a button saying ‘Activate’. Click on it.
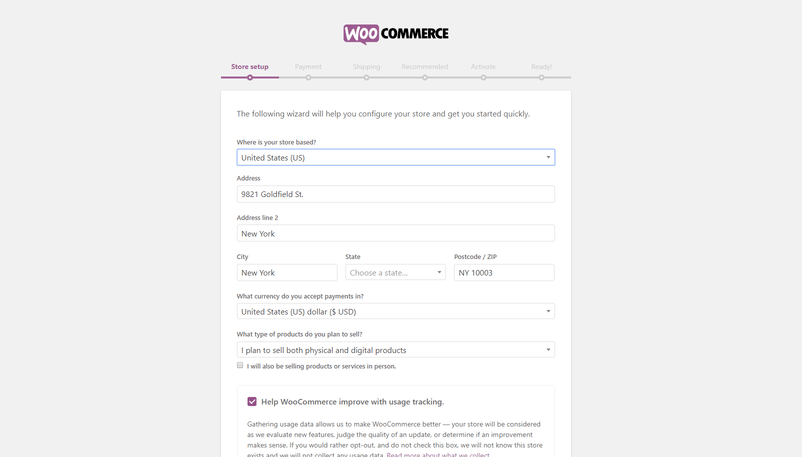
Now you will see WooCommerce’s setup wizard and by clicking on continue you can easily complete the setup process.
- Next, you will have to add your business details. In the last column it asks ‘What type of products do you plan to sell?’. You have to choose an option from the drop-down menu. Make sure you select ‘I plan to sell both physical and digital products’.
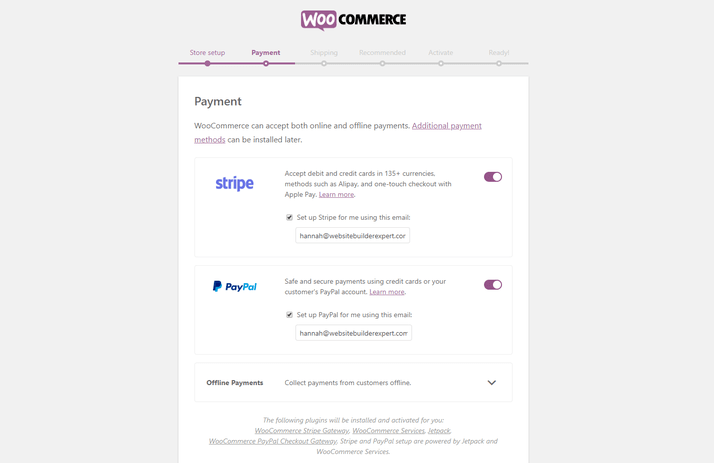
- Now you will have to choose the payment methods you are going to accept from your customers. Stripe and PayAPl are two most popular payment options. It is recommended that you enable both of them.
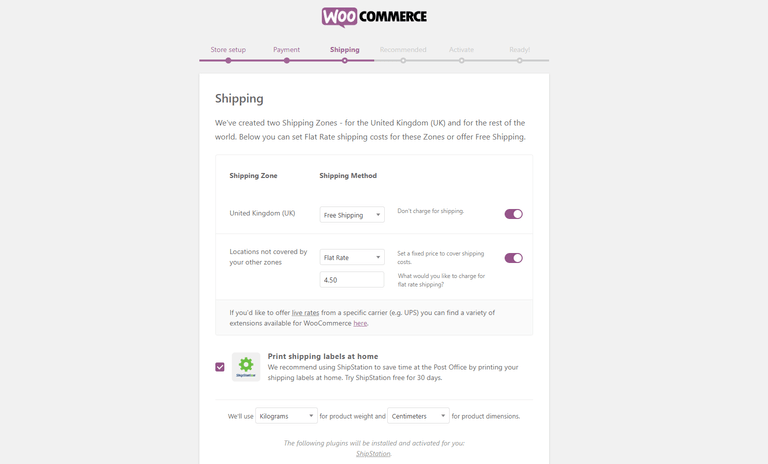
- After this, you will have to choose your shipping rates. WooCommerce recognizes the area you are currently in, and sets that as your main ‘shipping zone’. You can also set the rates the way you want. You can either set a fixed price for each zone or offer free shipping. There is also an option using which you can get live shipping rates. For this, you will have to integrate with specific carriers.
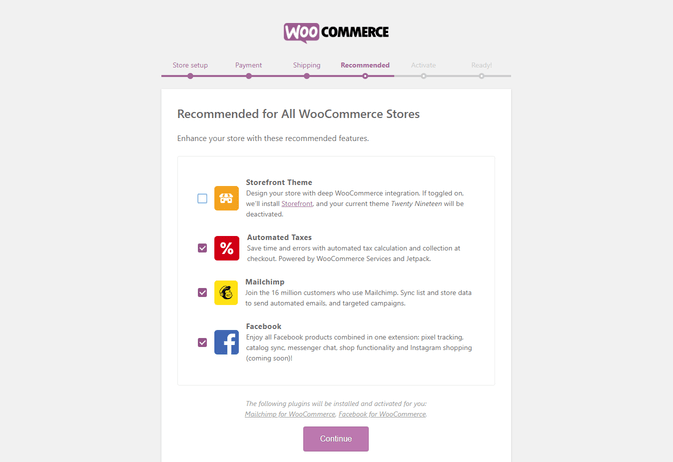
- In the next step, WooCommerce gives a list of recommended plugins. You can choose if you want to use any of them. You also get an option to opt for WooCommerce’s own theme.
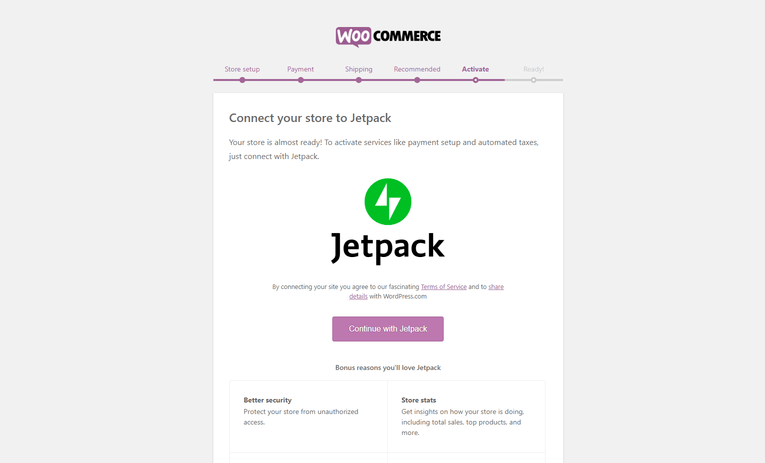
- The final configuration step requires you to activate Jetpack. You have to click on ‘Continue with Jetpack’. By doing this, you are enabling payment setup and automating taxes. Now you can start adding your product.
Select a Theme:
A website gets its physical appearance from the theme it uses. It acts as the basic design of the website. There are thousands of free and paid themes available for WordPress. You can choose any of them that can work well for your ecommerce site.
If you want to install a free WordPress theme then you can follow these steps:
- Log in to the dashboard of your website.
- Go to Appearance > Themes.
- Now you will see the theme dashboard.
- Here you will see a ‘Add New’ button.
- You can browse themes under different tabs like ‘Featured’, ‘Popular’ etc. Or you can also search for a theme from the search bar.
- Once you have picked one theme, click on ‘Install’.
- After a few minutes, you will see an ‘Activate’ button. Click on this and your themewill be activated.
To install a premium theme you have to follow these steps:
- Download the .zip file of the theme you have purchased.
- Log in to the dashboard of your website.
- Go to Appearance > Themes.
- Now you will see the theme dashboard.
- Here you will see a ‘Add New’ button.
- Click the blue button at the top that says ‘Upload Theme’.
- You will be prompted to choose a .zip file from your computer. Choose your theme file.
- After this, you will see a success message, with a link to activate your theme. By clicking on this, you can activate the theme.
Add Products:
What does a store look like without any products! Adding products is the last but most important step of this entire process. In WooCommerce, there are six main types of products:
- Simple
- Grouped
- External/Affiliate
- Variable
- Downloadable
- Virtual
You can always make changes to the ‘product’ section. To add a product:
- Go to the dashboard of your website.
- From the sidebar, go to the ‘Products’ section.
- Click on ‘Add New’.

Now you will have to add following things for every product you upload:
- Product name
- Price
- Main product image
- Additional product images
- Product description (long)
- Short product description
- Product category
Add Content:
After adding products to your website, you can start adding content to your website’s pages. To add a new piece of content to the website;
- Go to the website’s dashboard.
- From the sidebar, go to ‘Pages > All Pages’.
- Now you will see a list of all the pages on your website.
- Click on the page you want to add content to. Add content and click on ‘Update’.
Publish the Website:
When you are satisfied with your website, you can make it public. After uploading the privacy policy, you will see an option to publish the website. For this go to ‘Settings > Privacy’ and make the website public.
Wrapping Up!
Hopefully, this article has helped you to understand how you can build an ecommerce website using WordPress.
Still have some doubts about this? To get some expert advice you can call us on 1-866-332-O276. Our team of WordPress experts will assist you with all your queries.
FAQs:
QA: Is WordPress free to use?
Ans: WordPress is free to install, deploy and upgrade. You will only have to pay for the domain name and web hosting.
QA: Name a few ecommerce plugins that can be used to build an online store?
Ans: A few good ecommerce plugins are:
- WooCommerce
- eCommerce
- iThemes Exchange
- Orilla Cart – Ecommerce
QA: What are some popular payment options that we can use on our online store?
Ans: Stripe and PayPal are both popular options. It is recommended that you enable both of them.
QA: What are the factors you should focus on while choosing a payment gateway?
Ans: The factors that help you in choosing a payment gateway are:
- Cost
- eCommerce compatibility
- Financial information input
- Mobile compatibility
- Security and support
QA: Name a few plugins that you can add to make your ecommerce website better.
Ans: You can add some additional plugins to enhance the functionality of your online store. A few good options are:
- Yoast SEO
- Securi
- Site Reviews