If you are planning to create a website then you must have come across a few good options. Every website building platform has its own advantages also but if you want the process to be as smooth as possible then undoubtedly WordPress should be your choice. This is also one of the most popular options available for website building platforms. More than one-third of all the websites present over the internet are also being powered by WordPress. Once you start creating a website and engage customers, you will also have to purchase a suitable domain name.
And then you will also have to get web hosting. And the next step is to install WordPress. There are different automated tools also available for WordPress Installation. Some popular tools are QuickInstall, Softaculous, etc. Most of the time, these tools work perfectly but they also stuff your website with so many unwanted plugins.
To avoid this, the other option you also have is to install WordPress manually on cPanel.
Here we are going to discuss the process in great detail.
Step 1:
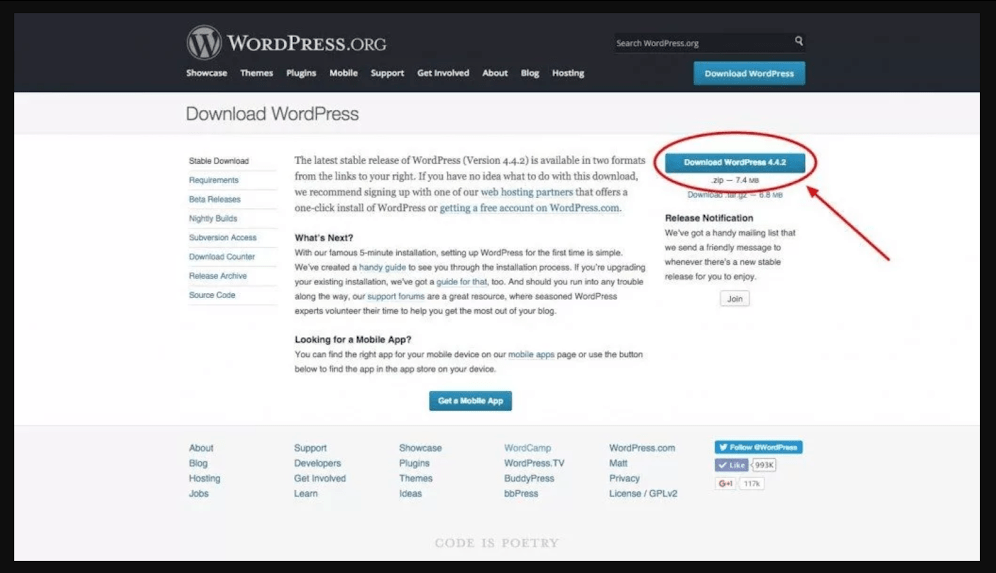
To get started, you have to download the latest version of WordPress. You can also get it from the official website of WordPress.
Step 2:
In the next step extract the.ZIP file and then also upload it to an installation directory. By now you must have got a web hosting provider also. Go to the File Manager and find that directory. In the cPanel toolbar, find the ‘Upload’ option at the very top and also find the file you have downloaded.
Once the.ZIP file is uploaded, you have to get back to the directory. You will also see the .zip file within the directory root. Click on this file to select it and then click on ‘extract’. After that, you will have to click on ‘reload’. Now you will also see the folder that you have just extracted.
Step 3:
After this, you will also have to move files from the folder to the directory root. Now Double click on the folder that you have just extracted. You will also see all the files. On the cPanel toolbar, you will also have to click on the ‘Select All’ option. This will highlight all the files. Now select ‘Move File’ and you will also see a pop up containing a directory link. From this directory link , get rid of the “/wordpress” tail also and then click ‘Move Files’. Now all the files will be moved to the directory root. If you also want to see them then click on the ‘Up One Level’ option present on the toolbar.
Step 4:
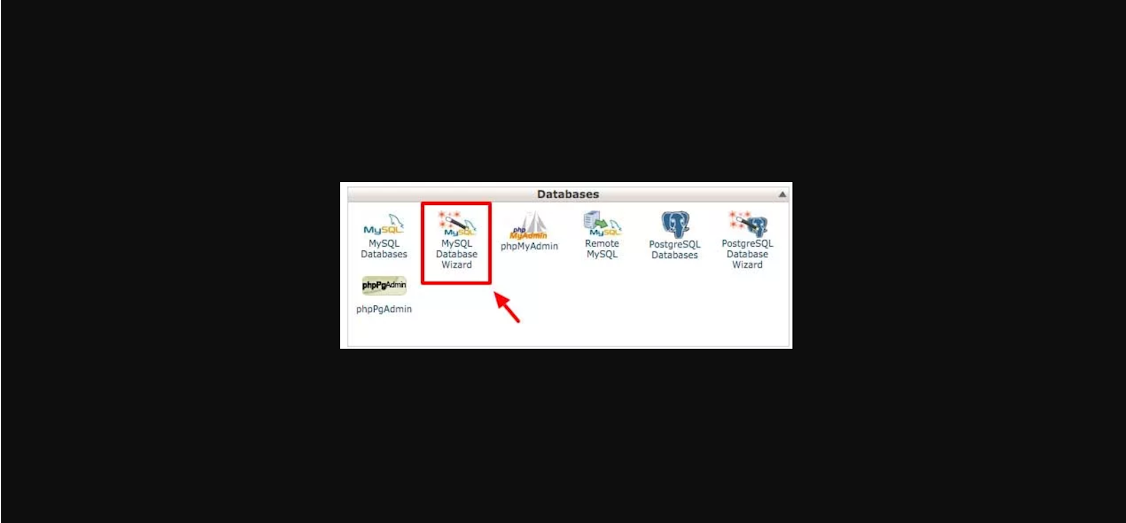
In this step, you have to create a new database and a user. Go to the main dashboard of cPanel and there click on ‘MySQL Database Wizard’. After that, you will get an option to create the database. You can give a name according to your convenience. And the database prefix will be followed by an underscore and a blank space. In this space, you can write the name of your database. The name should contain at least 3 alphanumeric characters.
Once you write the name of the database, click on the ‘next step’. Now you will have to create a Database User. Similar to the database name, you will also have to select the user name. The username you choose should have only 7 or less alphanumeric characters. Now choose a password for this username. You can either pick one of your choice or get one from the Password Generator. And just click on the ‘Create User’.
After creating the Database User, you will get an option to assign privileges. Here, you will have to check the box saying ‘All Privileges’. After that click on ‘Next Step’. Now you have successfully created the database.
Step 5:
In this step, you have to enter all the information about the database in the wp-config.php file. To do this, you have to open the File Manager and go to the proper directory. Here, find the file named ‘wp-config-sample.php’. Click on this and select ‘Code Editor’. Now click on ‘Edit’ and open the .php file.

One the file is open you can start adding your database information…
- Find the line “define(‘DB_NAME‘, ‘database_name_here‘);” and add your database name.
- After this find the line “define(‘DB_USER‘, ‘username_here‘);” and add your database username.
- Find the line “define(‘DB_PASSWORD‘, ‘password_here‘);” and add your database password.
Step 6:
In the next step, you have to replace the default Unique Keys and Salts. To do this, open the wp-config-sample.php file in the Code Editor and go to the section ‘*Authentication Unique Keys and Salts’. Here you can replace the default ones. After that click on ‘Save’ and get back to the directory root.
Step 7:
After this, you have to rename the ‘wp-config-sample.php’ to ‘wp-config.php’. For this, click on the wp-config-sample.php file and then click on ‘Rename’. Now you can change the name.
Step 8:
Now you have to run the WordPress Installation Script.
Wrapping Up!
When you create a website, you will have to perform many different steps. One of the most important steps is to install WordPress. In the above blog, we have explained the stepwise process of installing WordPress manually in cPanel.
If still your mind is full of queries related to the steps above then this is the case when the need for some expert help arises. At this point, you must have started wondering from where you can get the right help. There is no need to worry. You can contact us for all of your queries. Our team of WordPress Support Experts will assist you in every possible way. You can give us a call on 1-866-332-O276. We work 24×7.
FAQs:
Is it possible to automate the process of WordPress Installation?
Yes, it is possible.
What are some good WordPress installation tools?
Some good options are MOJO, QuickInstall etc.
What negative effect these tools have?
These tools can fill your website with unwanted plugins.
How many steps are there in the process of manual WordPress Installation using cPanel?
There are a total of eight steps.
Is it important to run the WordPress Installation Script?
Yes, it is very important.
Other Blog you might wish to read: