
Google Analytics is your way into analyzing your sources of traffic, getting the information about your target audience and the flow of engagement. Additionally, it helps you measure your bounce rate and archived data of your website’s previous performance. So, if you are a WordPress website owner and want to add to your site’s complete online health, then you need to read our guide on – “How to add Google Analytics to WordPress.”
There are more than 27,725,874 live websites using Google Analytics to improve their website’s online presence.
What is the key to growth? Having full awareness of where you are and where you intend to be. Google Analytics is your perfect partner in that. When you have the full knowledge of your targeted audience, the focus of your primary audience and where your faults are lying, you are in a better position to make informed choices.
If you are a WordPress website owner, then you have come to the right place, my friend!
We will help you take a bite of the booming online space!
How To Add Google Analytics To WordPress | Get Started!
It is sure that knowing who visits your website, when do they come, what are they doing when they are on your site and how do they find it!
Having your website incomplete knowledge of all this can help you strategize your online growth better. Having said that here are some of the ways that you need to be within order to get your Google Analytics WordPress sorted.
How To Add Google Analytics To WordPress | Sign Up
Step 1- This is the first step to install this free Google tool, the sign-up. If you do not have a Google account, you will need to make one. A Google account here will be a Gmail account.
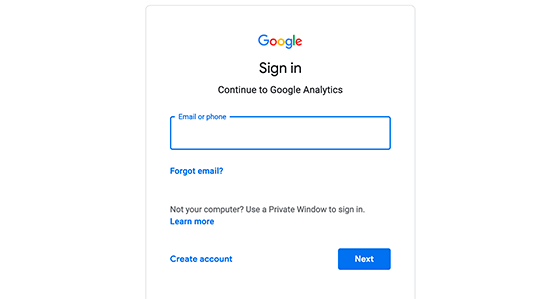
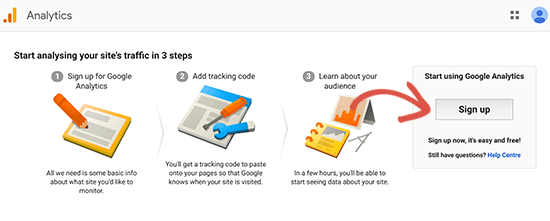
Step 2- Once you have signed up with your Gmail account, then there are chances, that you will be asked to sign up to Google Analytics with your Gmail id. The screen that will prompt you to do this, will look a lot like the one below.
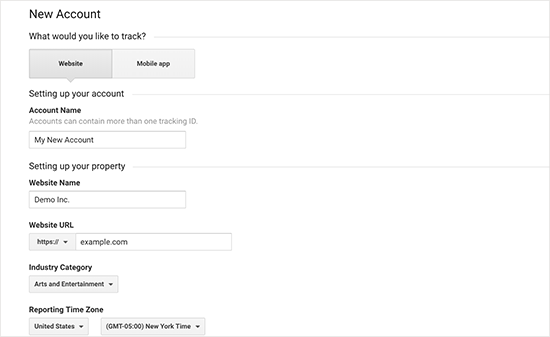
Step 3- In the next step, there will be a choice that you will have to make whether you are using the analytics for a website or a mobile app. Once you have made that call, that is when you are prompted to go further.
As you are a website owner and are looking forward to how to add Google analytics to WordPress, make sure you select the website.
Step 4- When you have completed all the above steps, then this is what you will be required to do, the tracking code. You will be given a tracking code for your website as you will need to log this into your WordPress website. There are many methods to do this. These we will be making clear to you in the steps below.
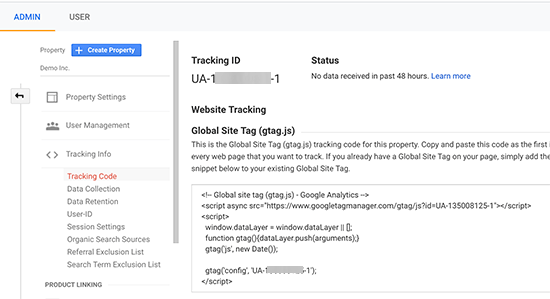
We suggest that you keep these steps open, as you might need to visit them sooner or later.
How To Add Google Analytics To WordPress | Plugins
There are many ways in which you can add Google Analytics to your WordPress site. Here are the many things that you can do, which we will explain one after the other.
1) Google Analytics Plugin MonsterInsights
- This is considered to be the most popular Google Analytics Plugin. There are over 1 Million active websites who are currently using it. Their users include giants like Bloomberg and PlayStation etc.
- They have a very simple process, to begin with, are friendly to the non-technical audience.
- The plugin also is available at both free and a premium paid version.
- The pro version has a vast number of advanced features like- tracking ads and e-commerce tracking among all the others.
There are the steps that you need to undertake if you are going to choose this mode to add Google Analytics to WordPress.
Step 1: You need to install and activate the MonsterInsights Plugin so that your website has done the initial things to do, to begin with.
Step 2: When the activation process is complete, you will complete it by having an additional menu item in your dashboard called insights. You will be able to see this in your Admin menu. Once you click onto this, you will enter the setup menu.
Which will somewhat look like this:

Once you have made the choice, you need to click on the ‘Save and Continue’ button.
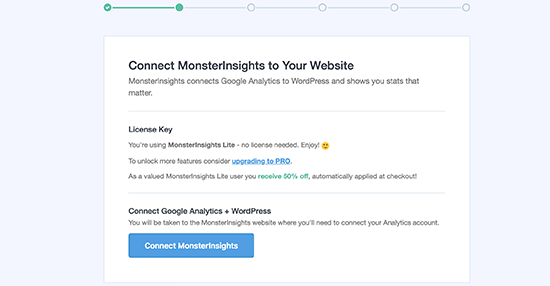
Once complete, go onto the “Connect MonsterInsights” button.
This will appear to look somewhat like the screen below:
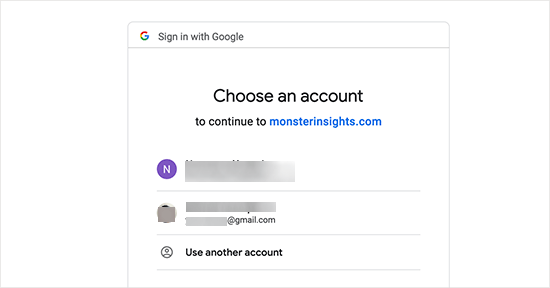
Step 3: Next, there will be a popup that will come onto your screen and you will be asked to either select or sign in to your google account.
Here is how it will appear:
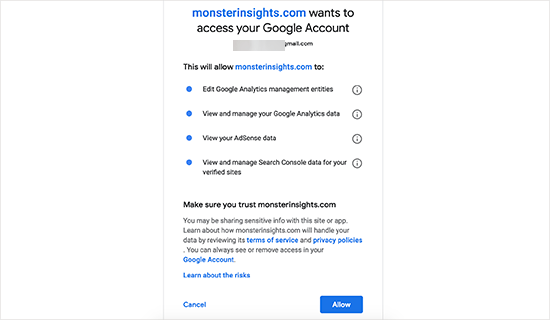
Step 4: MonsterInsights will then be asking for your permission to access your Analytics account. Once you accept it, you will reach the final step. But, first, you need to click on Allow.
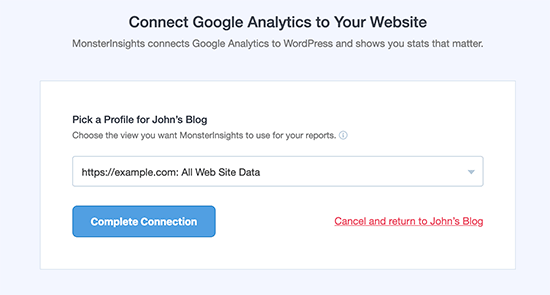
Step 5: You will now reach the final step where you will select the profile that you want to track. All you need to do is select your website and click on the ‘Complete Authentication’ button to continue.
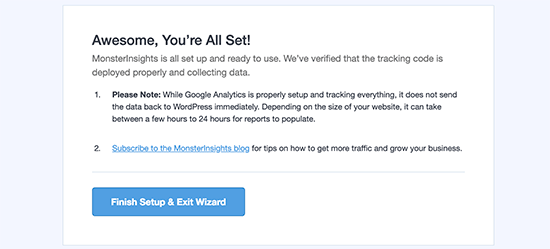
Step 6: MonsterInsights has now been successfully added to your website. You can configure the plugin according to the needs of your website.
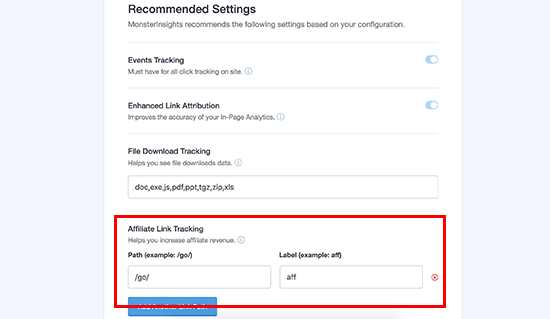
Our advice would be that the default settings work for most of the websites.
If you have affiliate links that you are working with, then all you need to do is add the path that you use to cloak the affiliate links in Google Analytics.
From here go on to the save and continue link.
If you want to add additional functionality to your plugin, then you can go in for the paid add-ons.
This will also upgrade you to the PRO settings.
There will be prompted for you to add the contact form plugin WPForms. You are free to skip this installation.
And that is it! All that you need is to start with your Google Analytics.
So if you are wondering about How to add Google Analytics to WordPress, then this your route through plugins.
You can add the MonsterInsights plugin here:
Get It For: Free/ Premium Paid Version
2) Insert Headers and Footers Plugin
When it comes to how to add Google Analytics to WordPress through plugins then there is the Headers and Footers Plugin as the second option.
This is what you need to do in this case.
One point of caution, to begin with, is that this Google Analytics Plugin will not give you the advanced tracking information and a comprehensible dashboard.
Step 1: First you need to install and activate the Insert Headers and Footers plugin.
Step 2: Go to the settings and choose the insert headers and footers page. Go back to the code, you got in Step 4 and paste it here. Go to the headers section and paste the code there.
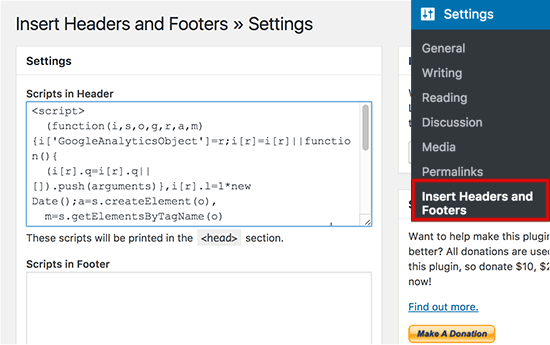
Just save your changes and you are done for the task!
How To Add Google Analytics To WordPress | Integrate It To Your Theme
If you are an advanced WordPress user and are aware of codes, then this option is doable for you.
A point of caution, that this step will vanish if you ever to choose to switch your theme. In case you plan on doing that, then you will have to make sure to add the code their too.
Step 1: Add your code in the header.php file.
This is a straight-forward step, all you need to do is go to the header.php file and paste the code that you had copied from step 4 above.
You need to paste the code after <body> tag.
Again, no matter what changes you undertake, you need to save and continue your changes.
Step 2: Add via the Functions File
You can also add the Google Analytics tracking code as obtained in Step 2 to the functions file.
This code is then automatically added to all the pages.
How To Add Google Analytics In WordPress | Wrapping Up
Google Analytics WordPress is your way to begin mapping the growth of your website in a more knowledgeable way.
This is the different facets to the ways in which you can add Google Analytics on WordPress.
We hope that this article was of help to you.
Let us know in the comments section below.